
SIEM tools are extremely useful for security engineers, but a major problem with SIEMs are false positives. No matter which SIEM tool an organization relies on, false positives are a common denominator across the board, since these security tools are generally built to support all environments. Security engineers often find themselves manually fine tuning these security rules, so they don’t generate any false positives in their environment, which significantly helps with reducing noise overall.
In this blog, we’ll go over a few methods to help minimize false positives. Our focus will be on more of a universal level, instead of highlighting specific security use-cases, in order to generalize the concept of how to fine-tune a correlation search. These techniques are applicable to every type of SIEM, but we’ll be using Splunk’s Enterprise Security as an example to make it as simple as possible to understand.
1. Find the correlation rules that generate the most amount of alerts in your environment.
- Navigate to the Incident Review dashboard in Enterprise Security.
- Events should appear towards the bottom of the dashboard
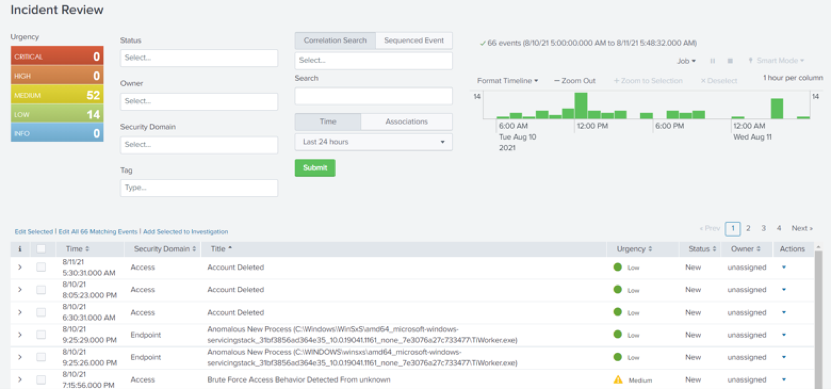
- In this example, the total number of events in the last 24 hours are 66 (52+14), but as you slowly start to enable more correlation searches in your environment that number will reach several thousand in no time.
- To avoid that from occurring, sort the list of events by name and go through them to find the most common events by title.
- Another way to determine which correlation rules have the highest event count would be to filter the correlation searches by name.
- Fine tune the limit
- Fine tune the specific values
Asset Intelligence
This method increases the limit count for a specified condition.
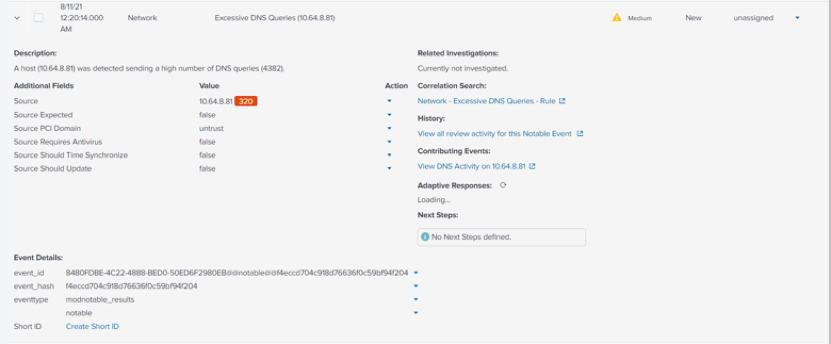
Let’s use the Excessive DNS queries correlation search as our first example.
- By default, the limit of this correlation search is set to 100 per hour (which is extremely low for most environments, as there would normally be a multitude of services and programs simultaneously running on several machines that are also requesting DNS alongside users).
- Click on the link underneath Correlation Search to open the search query for Excessive DNS queries.
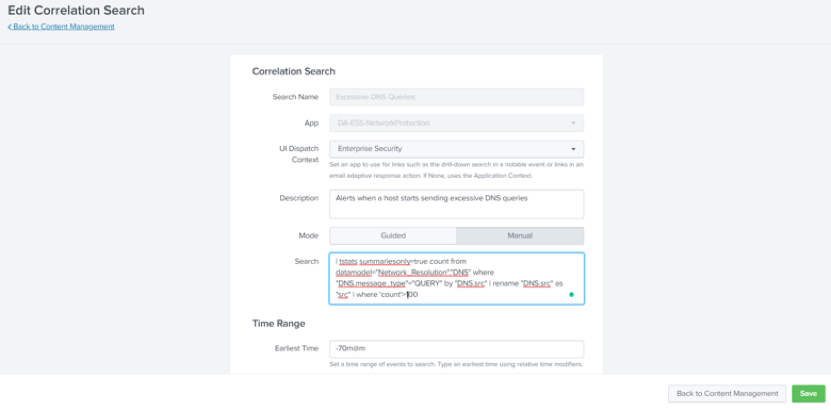
- Edit the count limit in the query and increase it based on your environmental needs, then click Save.
Fine tune specific values
This method increases the limit for a specific value (e.g., source_ip, machine, or users).
Our next example will cover the correlation search for Detect DNS requests to Phishing Sites leveraging EvilGinx2.
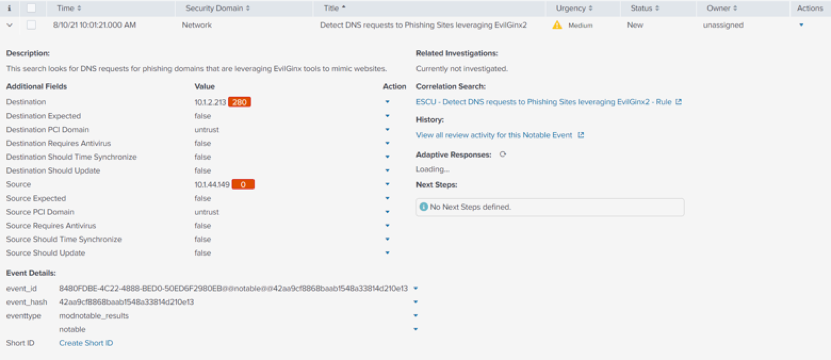
- This correlation search attempts to search for a domain that mimics the original domain, but many well-known domains will report as a false positive, which is why they need to be filtered out.
- Click on the link underneath Correlation Search to open the search query for Detect DNS requests to Phishing Sites leveraging EvilGinx2.
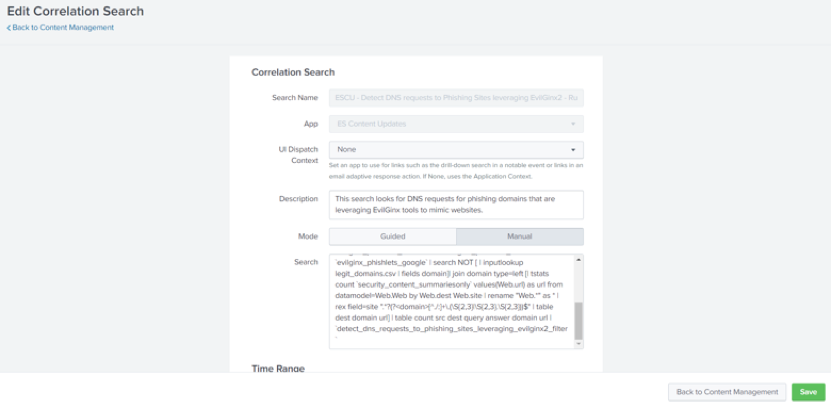
- Copy the search query and run it in Splunk’s Search & Reporting app.

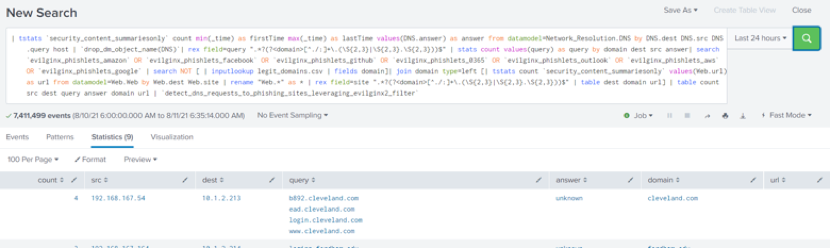
- Take a look at the domain field column, normally you would assume that the listed domains are legit, but the correlation search has detected that these are actually phishing domains.
- In our environment, we’ve detected apple.com, facebook.com and more as false positives.<l/i>
- Make note of the phishing domains, since we’ll be referring to them shortly.
- Locate the filter macro (`detect_dns_requests_to_phishing_sites_leveraging_evilginx2_filter`) at the end of the correlation search. Most correlation searches will have a filter macro. If not, you can always create a new macro.
- From the Splunk bar, go to Settings > Advanced Search > Search macros.
- Enter the macro name into the search filter.
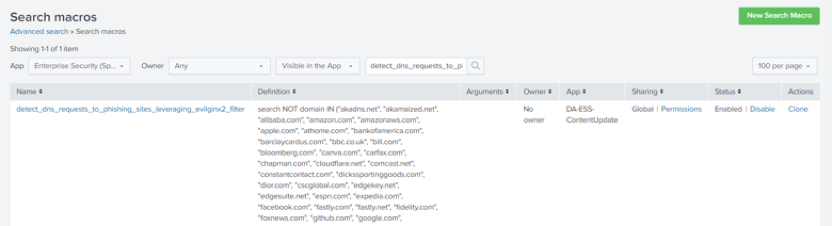
- Click on the macro name to open and update the macro definition. Update the macro definition based on the false positive domains you recently made note of.
- Any valid search query can be used as the macro definition.
- For example, we’re using the below syntax in our environment:
- Search NOT domain IN ()

- Update the macro definition and click Save.
- Macros are a substitute for search queries, so any acceptable field can be used to filter based on the generated search results.
Written by Ahad Ghani.
Any questions, comments, or feedback are appreciated! Leave a comment or send me an email to uhoulila@cr.jlizardo.com for any questions you might have.